Getting Started with Algolia
Oh hey there 👋! Have you had the pain of doing search from scratch? Or the feeling of daunt when your PM is like “you know what would be great? If we could have a search bar on website!” and your first thought is…

Yeah, I’ve felt that pain all too many times before. Honestly, I avoided it like the plague a few sprints because even when I did get the search all sorted, I felt like it wasn’t great and on top of that I would be half-way through documentation and wondering wtf, where is that module suppose to go?? really, not super fun.
Nowadays though, we have some great tools and services that makes this much easier for us. RIP building search from scratch days. Gah, I love technology. Making my life easier one day at a time.
This is one of the reasons I started playing with and eventually, joined the team at Algolia. I don’t want this to be one of those articles where you’re reading this like “oh god, she’s pitching me”. No, I genuinely would love to share with you what I learned with getting started at Algolia and how you can get up and coding stat. So let’s dive in with some steps you need to get search ready to go.
Obtaining your API keys
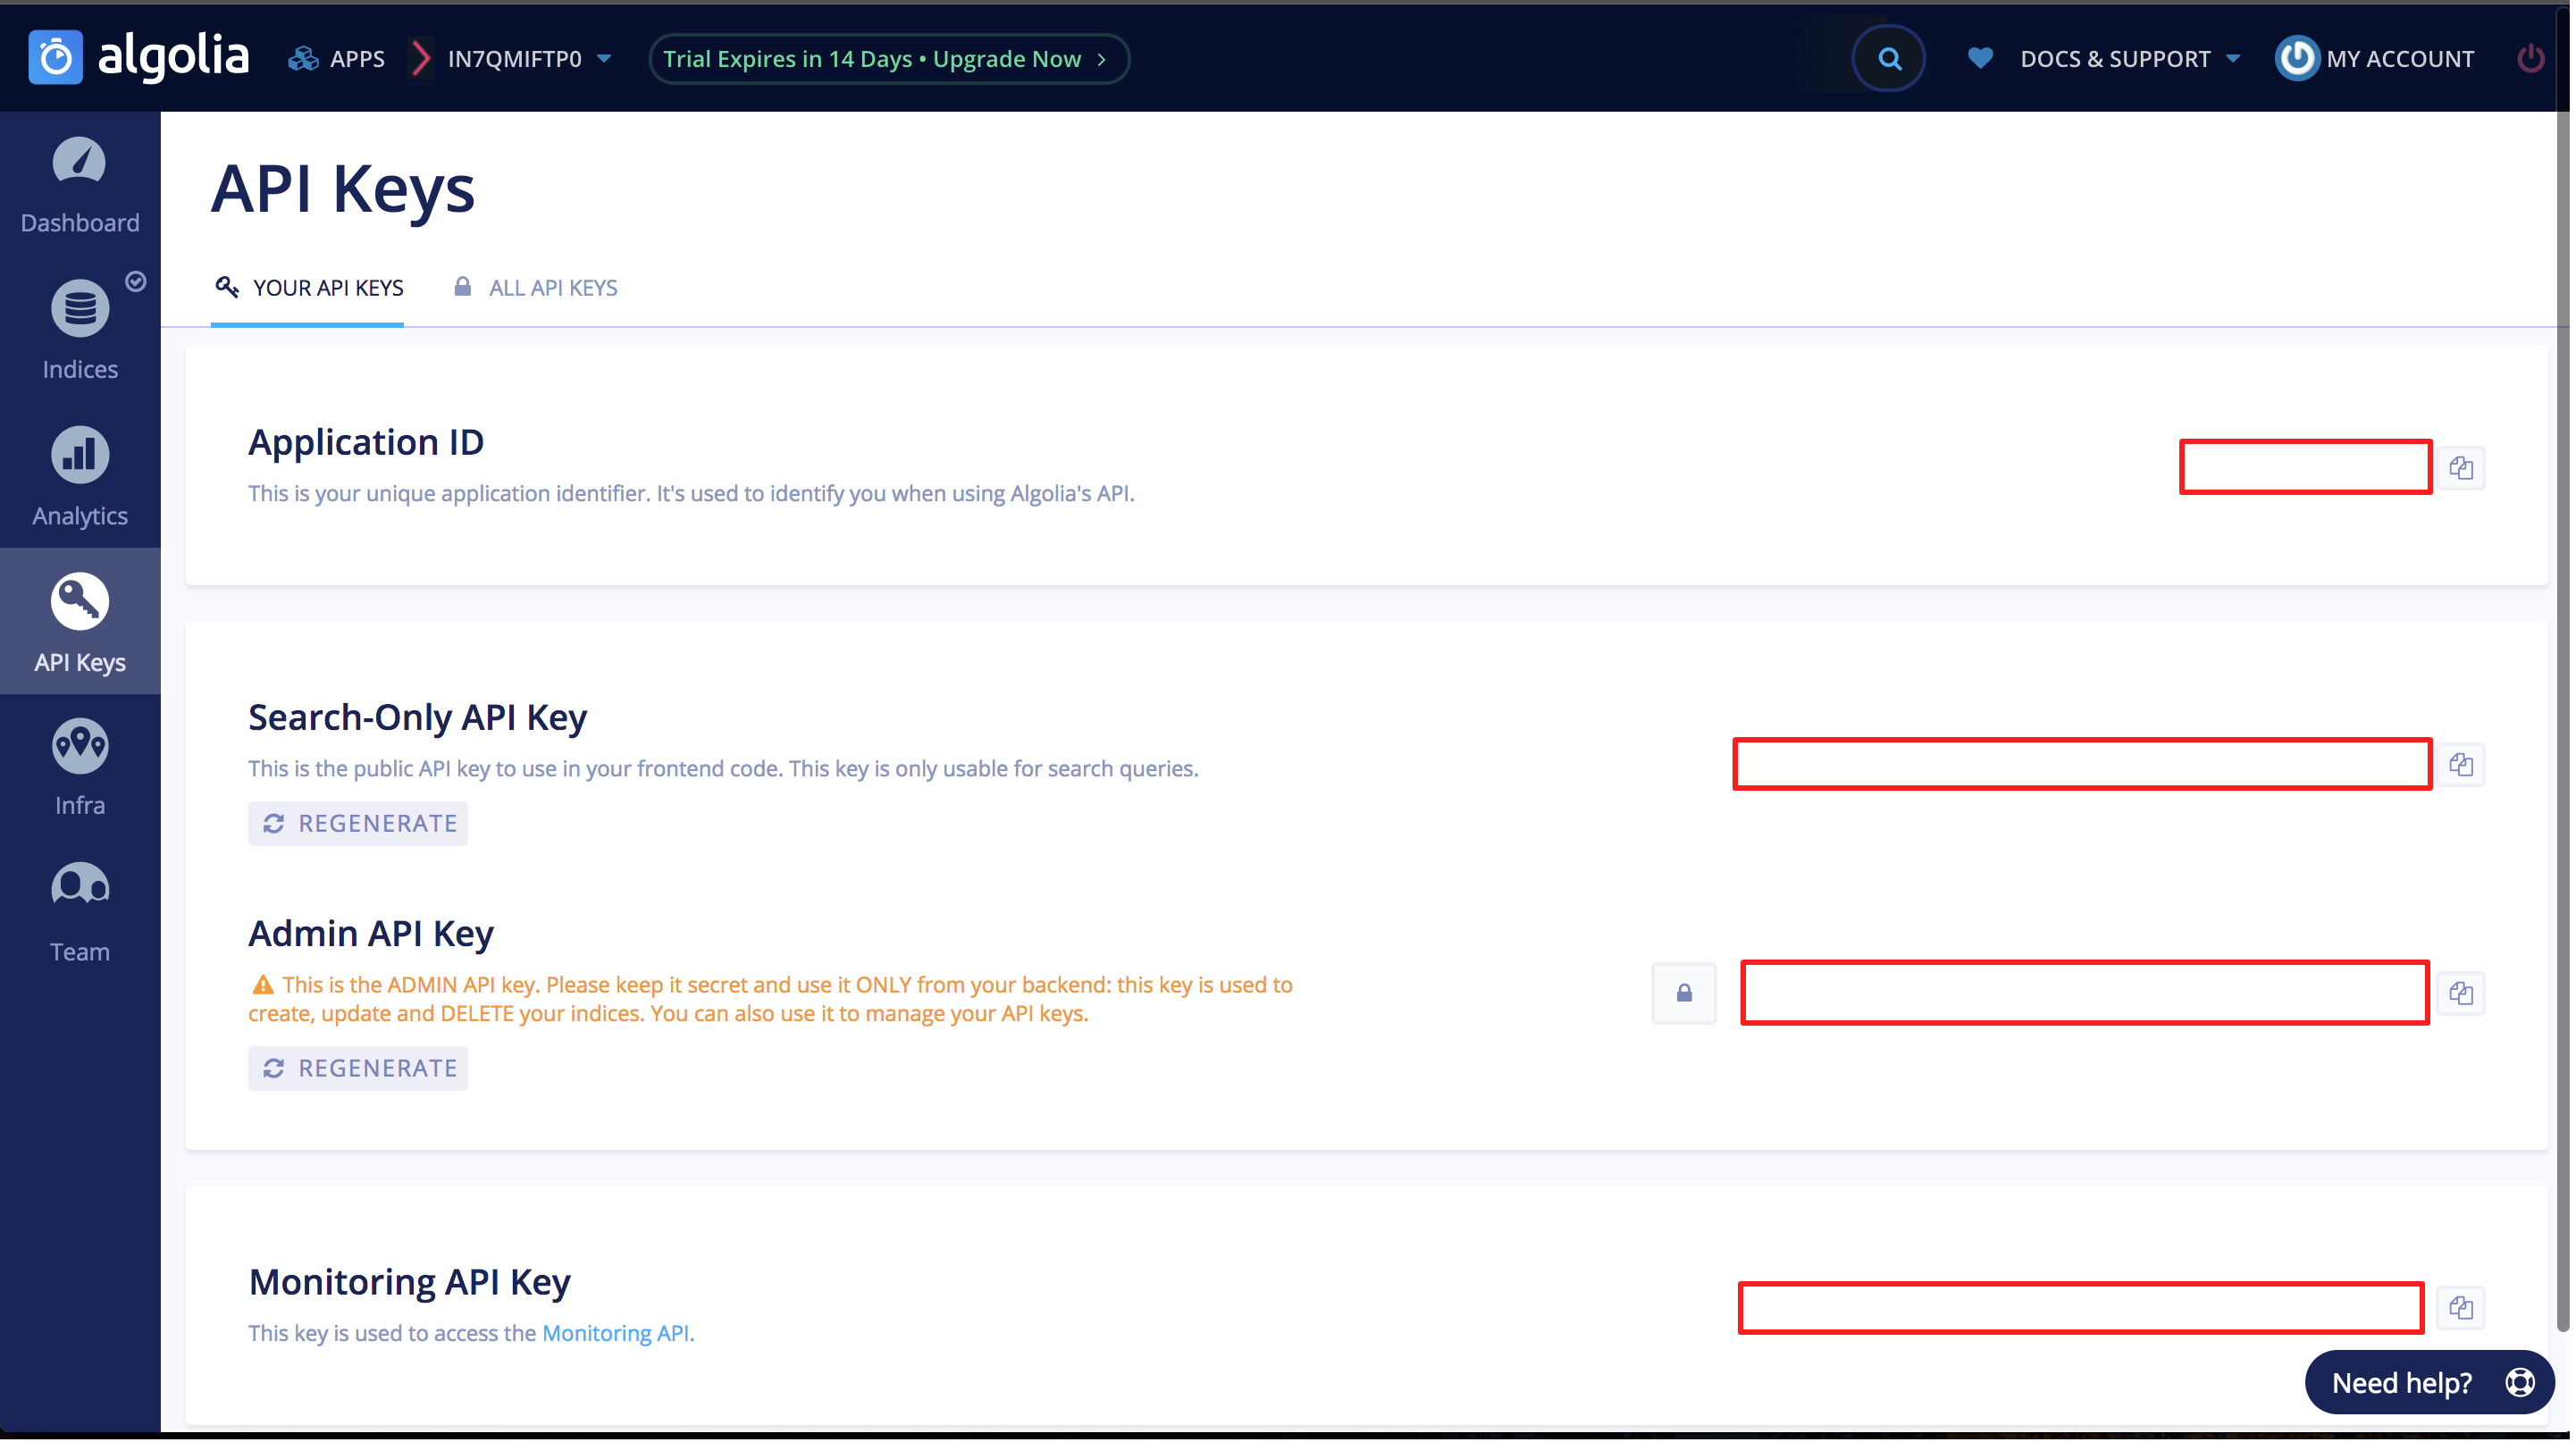
Start by creating an account at Algolia. Then grab your credentials from your dashboard. You’ll want to copy your App Id, Search Only API Key and Admin API Key.
Once this is complete, add them to whatever you’re using for your .env file so your app knows how to connect to your Algolia application and index. Boom! That’s the hard part.
Connecting your data source
If you have your data ready to go, we can begin by creating a function to call that url and push it into an index. Let’s use JavaScript as our language here.
1 | const data_url = "https://raw.githubusercontent.com/algolia/datasets/master/movies/actors.json" |
We will build on this function, but for now, it’s just curling that data_url we pass it, logging the first record we have in the data and returning out of the loop. We are using axios here for our api calls. Axios is a Javascript library used to make http requests from node.js or XMLHttpRequests from the browser and it supports the Promise API that is native to JS ES6. The advantage of using this over others, is that it performs automatic transforms of JSON data.
Prepping Data for Algolia
Now that we are making our call, let’s start using our Algolia account that we set up earlier and upload data to our index! We’ll do this in two steps, first we will iterate over the data we have received back from our axios.get call and make an array of objects. This will let us use only the data we want to highlight in our index. Then, once that is complete we can send to Algolia’s index..
Step 1: Instead of just returning a success response, let’s create a function to handle that upload by passing the response of our axios.get call.
1 | function indexData(data_url){ |
Now in this function, we want to go through our data points and create our algolia objects, which should be pretty straight forward loop.
1 | function dataToAlgoliaObject(data_points){ |
Step 2: Now that we have built up our objects, they are ready to be sent to Algolia! 
Let’s change a few things with our indexData function. We can chain a .then on our call because of axios promise structure and use async and await to make sure nothing gets out of sort before we upload data.
1 | function indexData(data_url){ |
Send Data to Algolia
Now, let’s write that sendDataToAlgolia function. Here is where we will be utilizing the keys we put in our .env file earlier. We will also need to be sure we have something that initiates our index and passes it the name of the index that we want to use to store our data. Since the dataset we are using is around movie actors, that seems like a good enough name as any to use.
1 | const algoliaClient = algoliasearch(process.env.ALGOLIA_APP_ID, process.env.ALGOLIA_ADMIN_API_KEY); |
Setting your settings
We’ve got data! But, now we want to tell Algolia how we want that data to be used. We can do this via the dashboard or code. I personally like to do via code, so let’s review that here. We have a lot of options, but we can do the basics:
searchableAttributes: list here what you would like searchable from the algoliaObject you created
attributesToHighlight: highlights the text you are searching for
customRanking: choose how your data will be displayed, desc() or asc()
attributesToRetrieve: return these attributes for dislaying in search results
1 | async function configureAlgoliaIndex(){ |
Let’s add this function once we have successfully uploaded data to our index.
1 | function indexData(data_url){ |
Wow, now we have data in our index and the way we want it. So, we are done with the back end of things, now onto the part where people can see our sweet sweet data and search for it.
Connecting the front end
Algolia has something called widgets, which allow us to quickly add sections to our HTML page without writing lots of new code. Elements such as a search bar and a place for our Algolia objects to be seen on the page can be easily added in with a few lines of JavaScript. Let’s head over to our client file.
We want to start by creating an instance of instant search we can utilize in our app. You can use cookies to pass this data from the server to the front end or you can have the keys in there. For length sake, we’ll show keys in here.
1 | $(document).ready(function() { |
Now let’s connect a search input to your html so users have a place to search.
1 | search.addWidget( |
Now we want to adds the results of our data, and in the return statement you can change what you want shown.
1 | search.addWidget( |
A good search experience shouldn’t overwhelm the user with results, so, let’s add pagination to the results we’re getting back.
1 | search.addWidget( |
Last but not least… let’s start the search! This instantiates everything on your page.
1 | search.start(); |
Of course, if you want to skip all this manual work, you can check out our quickstart app on Glitch, remix it and you’ll have all this code with a basic working app out of the box with about 5 minutes of effort.😉 Happy reading and hope this helped!